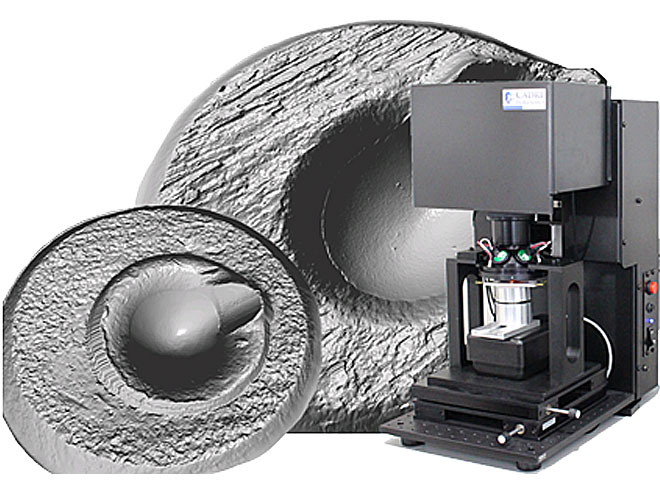
In 2013, Ryan Lilien the chief scientist at the Chicago-based Cadre Research Labs, developed a system called “TopMatch,” that he describes as a “3D surface topography imaging and analysis system for firearm forensics based on the GelSight imaging technology and custom feature-based image comparison algorithms.”
GelSight, developed at the Massachusetts Institute of Technology, is a novel technology for measuring high-resolution surface topography.
(3D Surface Topographies as measured using the TopMatch-GS 3D Imaging and Analysis system (incorporating the GelSight image sensor). Visualizations of measured 3D surface topographies for 9mm Luger cartridge casings showing granular, filed, and milled marks as well as aperture shear striated marks. Also shown are coins and a fingerprint. Demonstration of Virtual Light Source Manipulation. Note that images are not shown at full resolution and that firing pin impressions are not imaged (and thus appear flat). Courtesy of Cadre Research and YouTube)
The TopMatch system based on GelSight can provide forensic investigators with fast, micrometer-scale three-dimensional scans of cartridges that are significantly more detailed than earlier systems.

Lilien worked with GelSight, Oakland, CA, police department firearms experts, and researchers at NIST to develop the new scanning system.
This “next step” research, supported by NIJ, was intended “to fully establish the base credibility” of the technology by establishing the best scanning practices and demonstrating that, “the method meets the quality control criteria of other forensic instruments.”
The research was set up with three goals, detailed in a project summary report:
- Set up three datasets and develop five objective measures of scan quality
- Establish a set of best scanning practices, explore cleaning protocols, and study focus variation and lighting effects, and
- Develop system performance checks
The research included experiments that tested cleaning methods, lighting variation, aperture variation, precision, repeatability, and prediction.

The summary report notes that all of the research goals were met, including establishing carefully selected (cartridge) casing test sets and developing a series of scan quality and scanner performance metrics.
The report concludes that, “through this work we established best practices (cleaning, lighting, camera settings), demonstrated excellent repeatability and precision, eliminated the concern of persistence contamination, and showed that both novice and experienced operators can collect high quality scans.”
The researchers say the work “sets a solid foundation on which our scanning methodology and comparison algorithms can build.”
Following the completion of the “best practices” and methods verifications of this study, Lilien conducted a related, research project on scanning and comparing firing pin impressions (FPIs) on bullet casings.
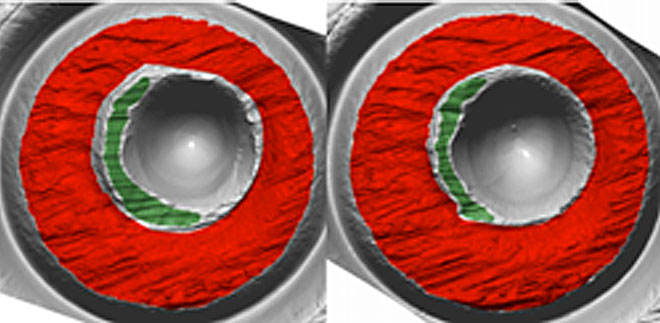
(3D Surface Topographies as measured using the TopMatch-GS 3D Imaging and Analysis system (incorporating the GelSight image sensor). This video demonstrates the heatmap visualization function where the surface of a pair of casings is shaded according to the degree of identified geometric similarity between the casings. Note that images are not shown at full resolution and that firing pin impressions are not imaged (and thus appear flat). Courtesy of Cadre Research and YouTube)
The one-year study, also supported by NIJ, created a scanning protocol and deployed the system to crime labs to verify its abilities. He also developed software for “virtual microscopy,” which allows investigators to examine virtual casings instead of the physical casings.
This allows easy inter-lab collaboration and consultation without transferring the evidence from lab to lab.
The findings from the project, the researchers concluded, benefit the criminal justice system and the ability to more accurately “present firearm identification and tool mark evidence in the courtroom.”
(See an overview of GelSight and how it can be used to visualize and measure surfaces. Courtesy of kimoatmit and YouTube.)
About This Article
The research described in this article was funded by NIJ cooperative agreement numbers 2014-DN-BX-K012 and 2015-DN-BX-K032, awarded to Cadre Research Labs, Chicago, Il.
This article is based on the grantee reports “Applied Research, Development, and Method Validation for a Statistically Based Comparison of Tool Marks using GelSight-Based Three Dimensional Imaging and Novel Comparison Algorithms for Firearm Forensics” (pdf, 30 pages) and “Applied Research, Development, and Method Validation of Tool mark Imaging, Virtual Casing Comparison, and In-Lab Verification using a GelSight-Based Three Dimensional Imaging and Analysis System for Firearm Forensics” by principal investigator Ryan Lilien of Cadre Research Labs, Marcus Brubaker, Pierre Duez, and Todd Weller.
National Institute of Justice, “Establishing Scientific Criteria for 3-D Analysis of Cartridges,” November 20, 2017, NIJ.gov: https://nij.gov/topics/forensics/evidence/impression/Pages/establishing-scientific-criteria-for-3d-analysis-of-cartridges.aspx
TopMatch-GS 3D
- 3D Imaging and Analysis for Firearm Forensics
- Captures Micron Scale Surface Geometry
- Fast, Accurate, High-Resolution 3D Surface Measurement
- Validated Correlation and Database Search Algorithms
- Backed by an Interdisciplinary Team of Computational and Forensics


